Published
Do you know what really happens in your home when you are away? Now you can. http://bit.ly/1KOBH31
Watch more How to Use Microsoft Excel videos: http://www.howcast.com/videos/487047-How-to-Add-and-Delete-Rows-and-Columns-Microsoft-Excel
Learn how to add and delete rows and columns in this Howcast Excel tutorial with expert Shir Moscovitz.
Hi, my name is Shir and I'm the founder and CEO of shirconsulting.com where we focus on converting the existing data from your business into massive savings and extraordinary profits. Today we're going to learn the basics of Excel. Let's get started.
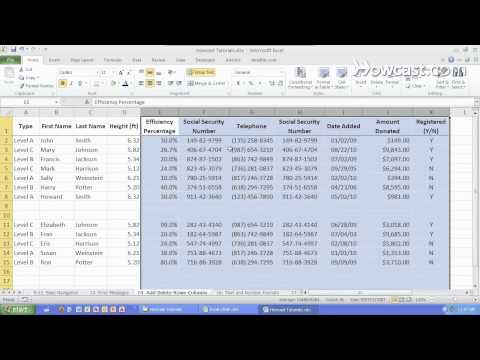
So now let's talk about how to add and delete ROWS and COLUMNS in EXCEL. If you want to create more space to work with in between certain CELLS that you're working with - instead of moving them around you can simply go to the ROW, go underneath the ROW that you want to INSERT, right click on it, hit the INSERT option and everything slides over one. You can then type away over here.
We can do the same exact thing with COLUMNS. If you do a right click and hit INSERT - it will always appear before where you did that. So same with this - with the ROW - it will INSERT before that ROW.
You can do this a little bit faster if you want to multiple instead of doing one at a time. You can select a bunch at once and it will always INSERT that many - which is five now - to the left. So let's try that. Click INSERT and we get five new COLUMNS.
Another useful trick is to do - let's just delete these - another useful trick is to do one at a time but a little bit faster. Let's do right CLICK, INSERT and now we use the keyboard shortcut of F4 which repeats the last action. That actually works for a lot more then just INSERTING COLUMNS. It works for Formatting as well. And we can keep hitting F4 to get as many as we need.
Another cool trick - let's delete these - is to move some of these COLUMNS around. So if I right click on this COLUMN and I copy it or hit CTRL+C with the keyboard, I can then right click over here and INSERT the copied CELLS. So I have another COLUMN now with the same exact data. If I don't want to make a copy and I hit undo I can simply select this, hit CUT, right click and hit CUT or hit CTRL+X on the keyboard. I can then right click over here and INSERT CUT CELLS and it re-ordered the COLUMNS.
In order to add and delete ROWS you can do the same thing. You can simply click over here, right click, INSERT and you get more. You can do the same COPYING and PASTING the INSERTED CELLS like that or you can CUT and INSERT the CUT CELLS.
A really useful trick also with the keyboard is to select the entire COLUMN by hitting CTRL+SPACE
and then using the keyboard shortcut CTRL and SHFT and then the + sign which inserts a new COLUMN. You can do the same thing using the keyboard, hit SHFT and then SPACE to select the entire ROW and you can do CTRL, SHFT, + . If you want to delete a ROW, you hit CTRL and then the - sign. If you want to delete a COLUMN, you must first select the COLUMN, CTRL+SPACE bar, and then hit the CTRL and - to delete that COLUMN. And that's how you add and delete ROWS and COLUMNS in Microsoft EXCEL.
Watch more How to Use Microsoft Excel videos: http://www.howcast.com/videos/487047-How-to-Add-and-Delete-Rows-and-Columns-Microsoft-Excel
Learn how to add and delete rows and columns in this Howcast Excel tutorial with expert Shir Moscovitz.
Hi, my name is Shir and I'm the founder and CEO of shirconsulting.com where we focus on converting the existing data from your business into massive savings and extraordinary profits. Today we're going to learn the basics of Excel. Let's get started.
So now let's talk about how to add and delete ROWS and COLUMNS in EXCEL. If you want to create more space to work with in between certain CELLS that you're working with - instead of moving them around you can simply go to the ROW, go underneath the ROW that you want to INSERT, right click on it, hit the INSERT option and everything slides over one. You can then type away over here.
We can do the same exact thing with COLUMNS. If you do a right click and hit INSERT - it will always appear before where you did that. So same with this - with the ROW - it will INSERT before that ROW.
You can do this a little bit faster if you want to multiple instead of doing one at a time. You can select a bunch at once and it will always INSERT that many - which is five now - to the left. So let's try that. Click INSERT and we get five new COLUMNS.
Another useful trick is to do - let's just delete these - another useful trick is to do one at a time but a little bit faster. Let's do right CLICK, INSERT and now we use the keyboard shortcut of F4 which repeats the last action. That actually works for a lot more then just INSERTING COLUMNS. It works for Formatting as well. And we can keep hitting F4 to get as many as we need.
Another cool trick - let's delete these - is to move some of these COLUMNS around. So if I right click on this COLUMN and I copy it or hit CTRL+C with the keyboard, I can then right click over here and INSERT the copied CELLS. So I have another COLUMN now with the same exact data. If I don't want to make a copy and I hit undo I can simply select this, hit CUT, right click and hit CUT or hit CTRL+X on the keyboard. I can then right click over here and INSERT CUT CELLS and it re-ordered the COLUMNS.
In order to add and delete ROWS you can do the same thing. You can simply click over here, right click, INSERT and you get more. You can do the same COPYING and PASTING the INSERTED CELLS like that or you can CUT and INSERT the CUT CELLS.
A really useful trick also with the keyboard is to select the entire COLUMN by hitting CTRL+SPACE
and then using the keyboard shortcut CTRL and SHFT and then the + sign which inserts a new COLUMN. You can do the same thing using the keyboard, hit SHFT and then SPACE to select the entire ROW and you can do CTRL, SHFT, + . If you want to delete a ROW, you hit CTRL and then the - sign. If you want to delete a COLUMN, you must first select the COLUMN, CTRL+SPACE bar, and then hit the CTRL and - to delete that COLUMN. And that's how you add and delete ROWS and COLUMNS in Microsoft EXCEL.
- Category
- Tech
Sign in or sign up to post comments.
Be the first to comment
Up Next
Autoplay
-
01:57

How to Substitute Values on Microsoft Excel : Excelling at Microsoft Excel
-
08:14
Excel Gantt Chart Tutorial - How To Make A Gantt Chart In Microsoft Excel 2013 Excel 2010 Excel 2007
-
01:21
How to Remove Columns in MS Excel : MS Excel Tips
-
02:19
How to Do a Heading Then Change to Columns in Microsoft Word 2007 : Microsoft Word Tutorials
-
01:22
How to Select Multiple Columns & Rows in Microsoft Excel : MS Excel Tips
-
04:23
Formulas In Microsoft Excel: How To Change A Letter Into A Number : Using Microsoft Excel
-
01:26
How to Delete Normal Grey Borders in Excel : MS Excel Tips
-
05:31
How to Delete Duplicate Rows From a List in Excel or Microsoft Office Online : Using MS Excel
-
00:50
How to Find Hidden Microsoft Excel Cell References : Tips for Microsoft Excel
-
02:35
How to Use an "If Statement" in Excel to Delete Blank Rows : Microsoft Office Lessons
-
01:32
How to Compare Two Things Using Columns on Microsoft Word : Microsoft Word Help
-
22:44
Microsoft Excel - Tự Học Excel Hiệu Quả Nhất. Bài 1: Giới Thiệu Microsoft Excel.
-
02:03
Adding & Subtracting Vertical Columns in Excel : MS Excel Tips
-
01:38
How to Create a File Association in Microsoft Excel : Tips for Microsoft Excel
-
02:07
How to Convert Microsoft Word Columns Formatting to Table Fo... : Applying Microsoft Word Knowledge
-
04:58
Microsoft Excel: How To Freeze Rows Or Columns
-
02:05
How to Add Leading Zeros in Excel : Excelling at Microsoft Excel
-
02:11
How to Merge Text From Two Columns Into One in Microsoft Excel : MS Excel Tips
-
04:17
Excel: How to Populate a Formula in All Rows : Using MS Excel
-
01:22
How to Delete Footers in Excel : Excelling at Microsoft Excel
-
05:08
How To Merge Multiple Columns Into A Single Column Using Microsoft Excel
-
01:33
How to Create Line Graphs With Two Groups in Microsoft Excel : Excelling at Microsoft Excel