Published
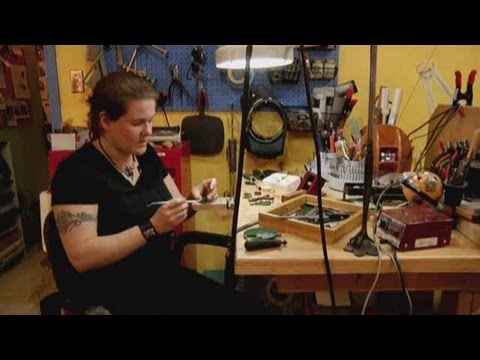
Watch more How to Make Jewelry videos: http://www.howcast.com/videos/481619-How-to-Make-Gold-and-Silver-Jewelry-Jewelry-MakingLearn how to make silver jewelry from jewelry designer Courtney Gray in this Howcast video.Courtney Gray: Welcome to Creative Side Jewelry Academy of Austin, online at creativeside.org. I'm Courtney Gray. I started my school here, Creative Side Jewelry Academy, four years ago. I'm here in Austin, and I'm going to tell you about jewelry making today.So today I'm going to talk to you about one way that I approach making silver and gold jewelry, and that's carving wax. I teach this here at the school. This is one of my favorite ways to create jewelry. If you're doing rings, you're going to start with a tube of wax, cut your wax according to size and width that you need. The purple is a little bit more flexible, the green wax a little bit more brittle.Order yourself a little kit. This is process that, you know, it takes patience, but luckily it's very fun and relaxing to work with this material. One thing you're going to need to get to cut designs out of wax is a spiral blade. This is a blade with teeth that go all the way around, allowing the wax to simply fall out of the piece as it cuts. Start your blade and cut around. Now these cut a wider line, so you want to be sure to stay outside that line. These blades are wonderful, you can go in almost any direction with this circular blade, which is very unlike working in metal. Try to keep your soft frame at a 90 degree angle.I love wax because it lends itself to a more sculptural look. You can make really dimensional pieces with it, it's really neat stuff. This is a really lovely tool, it's double-sided. There's a coarse side and a fine side. Then you can carve down using this tool, I use this tool for a lot of roughing out, and then I go back in with finer tools like dental picks. A lot of wax carvers will use an Exacto knife.Once you've created your wax, you've got to get it perfect, exactly how you want to see it—get all the little flaws out. Any scratch in your wax is going to show up in your metal like ten-fold. I mean it really shows. You're going to "sprue" them up, we use the word sprue. It's basically creating a feed line that goes to your piece. And then we're going attach it to this button area here. This is a rubber base, and you may not end up doing this part in your studio. There's a lot of equipment involved. I'm sure you have a local casting company. We actually offer this service here at Creative Side Casting—have them cast into whatever metal you choose. You're going to take your metal pipe. It's called a flask, needs to fit right around without anything touching the edges, and then your pieces are levitating in the center there, okay? At that point we're gonna pour a plaster type material called "investment" into this opening, and it's going to solidify around your waxes kind of like a plaster of Paris type mold.Once it's solidified, we're going to take this rubber base back off and put it in a kiln, burn it out over about an eight hour burnout cycle. This is the centrifuge, I'm spinning the centrifuge spring so that it's coiled up, it doesn't look like it's really coiled, but trust me it is. From the kiln, you'll place it into the centrifuge and connect the two. You'll be melting your metal in this crucible, which is kind of like a little ceramic oven. And once it's ready to go, you're going to let the centrifuge go and it's gonna spin and shoot that metal into your mold. The flask will just dissolve in water, all the investment will fall out—you'll clean off the investment. Take your gold or silver jewelry, and you'll saw it off. And finish out any sprue marks, and, of course, polish and sand everything.
- Category
- Arts
Sign in or sign up to post comments.
Be the first to comment
Up Next
Autoplay
-
01:46

How to Sell Handmade Jewelry | Jewelry Making
-
02:58
Men's Jewelry Necklace Pattern Ideas : Creative Jewelry Designs & Tips
-
02:19
How to Design Rock & Roll Jewelry : Creative Jewelry Designs & Tips
-
01:12
How to Make Metal Jewelry | Jewelry Making
-
01:11
How to Pick a Jewelry-Making Kit | Jewelry Making
-
01:24
How to Attach Jewelry without Soldering | Jewelry Making
-
01:34
How to Cast Jewelry | Jewelry Making
-
00:51
Confusing ???? English Prepositions - WORK FOR vs WORK IN vs WORK AS vs WORK ON #englishtips #letsta
-
05:34
Silver Price Suppression and Profiting from the Gold-to-Silver Ratio
-
00:52
How to Clean Silver Jewelry With Stones : Jewelry Confidential
-
02:02
Abalone Shell Jewelry Ideas : Creative Jewelry Designs & Tips
-
01:04
Jewelry Settings for Pendants : Jewelry Designs & Care
-
01:28
What Is Jewelry-Making Hardware? | Jewelry Making
-
01:38
Essential Jewelry-Making Supplies | Jewelry Making
-
01:03
Shining Silver After Soldering Jewelry : Jewelry Designs & Care
-
01:06
What Is Pure Gold & Silver? : Jewelry Worth Wearing
-
05:34
Silver Price Suppression and Profiting from the Gold-to-Silver Ratio
-
02:17
Essential Jewelry Tools | Jewelry Making
-
01:02
How to Make Jewelry with Courtney Gray | Jewelry Making
-
00:27
How to Polish Silver Without Silver Polish - CHOW Tip
-
21:26
Washington Shutdown, Yield Inversion, Silver Explodes: Pure Silver Mining Stock REBOUNDS SHARPLY!
-
03:22
How to Make Gold&Silver Jewelry | Jewelry Making